Do you need help going managing your privacy on Facebook? Do you know how to review your Facebook posts, for example? Do you know whether your online friends can view the things you post on your profile?
If you don’t, no worries at all. Facebook has made it a little easier for Facebook users to check their privacy settings. They’ve also made it easier to check who can see our Facebook posts and which apps can send you notifications.
Best of all, we’re going to show you how to review who can see your Facebook activity step by step.
Facebook’s Privacy Checkup: An Easier Way to Manage Your Privacy Settings
As we just stated, managing your privacy settings on Facebook is much easier than before.
That’s because we now have the Facebook Privacy Checkup! Facebook’s blue dinosaur, the “Zuckersaurus,” is the little mascot that will guide you through your privacy settings. Don’t ask why they chose a dinosaur.)
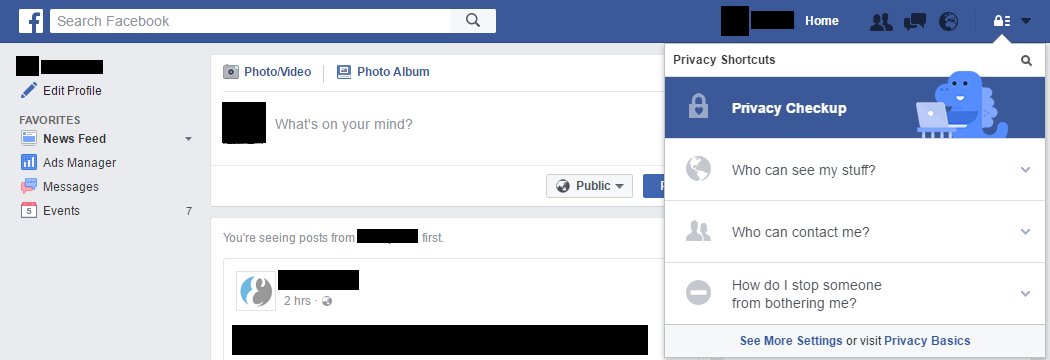
With the click of a button, the Privacy Checkup will direct you through three different elements of your Facebook privacy settings:
1) Posts
2) Apps
3) Profile
Let’s go through them together, one by one.
1. How to Review Your Facebook Posts
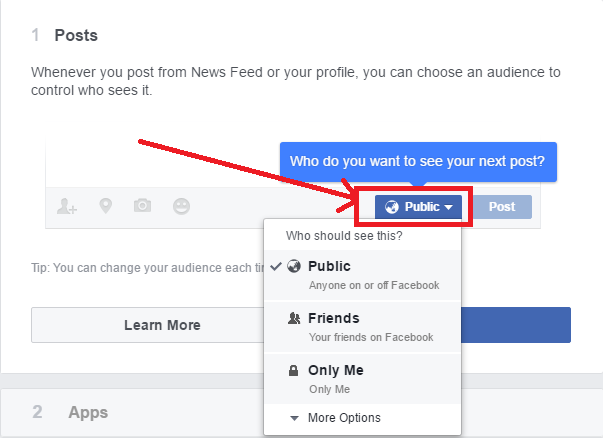
When you click on Privacy Checkup, the first step will take you through how to make sure you’re sharing your posts with the right people.
There will be a blue comment box that asks you, “Who do you want to see your next post?”
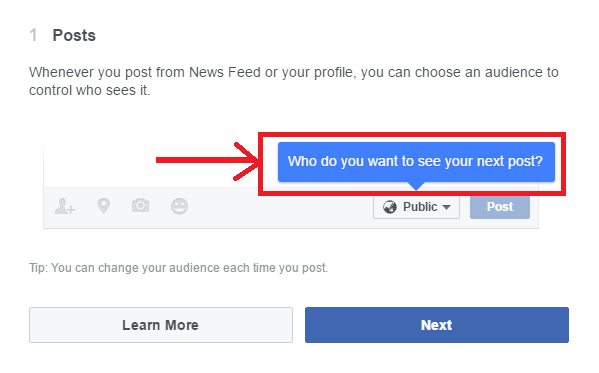
Underneath that, you will find the current privacy settings for your Facebook posts.
• If it’s set to ‘Public,’ anyone can see your Facebook posts (whether they have a Facebook account or not).
• If it’s set to ‘Friends,’ your friends can see your Facebook posts.
• If it’s set to ‘Only Me,’ no one else can see your posts except you.
• There’s also a ‘More options’ tab, which gives you the opportunity to create a customized list of Facebook friends you would like to see your posts.
Can I Create Some Facebook Posts for ‘Friends’ and Some Posts for ‘Only Me’?
Yes, you can!
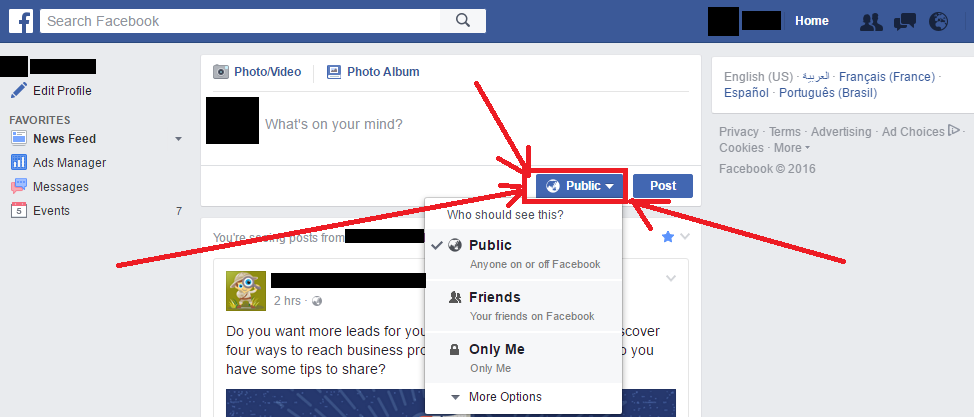
Under the Facebook post you create, there are two buttons: one is to post, and the other for who can see it.
You don’t have to change your privacy settings if you want to create a post with different privacy options. Just change it for that specific post once you create it; you’ll get the same options as the ones noted above.
You Can Even Go Back to Change Your Previous Facebook Posts!
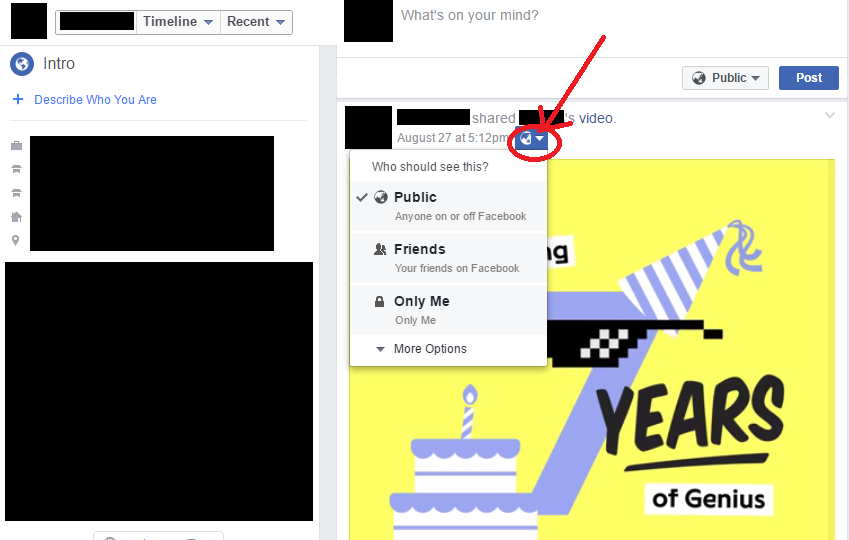
Remember that you can change the sharing settings of any individual Facebook update you post… even ones you already posted. To do this, click on the blue button right next to the date you posted the video.
2. Review Your Facebook Apps Permissions
Mobile apps are probably everyone’s favorite thing nowadays. After all, there’s an app for just about anything!
You’ll be surprised at how many apps you installed through Facebook. The only problem is when you don’t use them anymore.
When you stop using Facebook’s apps, you give them permission to post to your Friends list.
Remember all those Candy Crush and Farmville requests you used to get? If your reviewed their Facebook app permissions, you wouldn’t have this problem.

These app requests can get annoying, right?
How to Review Your Facebook Apps Permissions
Do you remember all the Facebook apps you used during your time on Facebook? Review your list of apps in your Facebook privacy settings; we’re sure you’ll find one that you don’t need anymore.
This second part of the privacy checkup shows you a list of every app you agreed to install to your Facebook account. It also shows you what sharing permissions it has (i.e. whether it can share with your friends, the public, or just you).
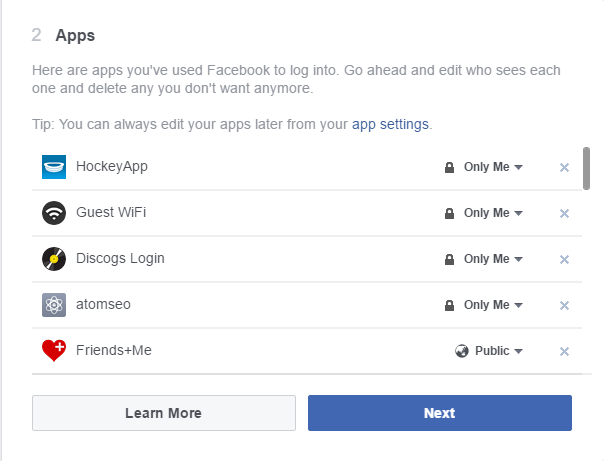
We recommend that you should just delete the app if you don’t use it. Don’t be that annoying Facebook friend everyone hates because you don’t know how to review your Facebook app settings.
Just click on the x on the right-hand side of the screen for all the apps you no longer use. Your Facebook friends will appreciate it. 😉
3. How to Review Information on Your Facebook Profile
The third and final element the Facebook Privacy Checkup allows you to review is your Facebook profile.
Here, you can find out who can see some very personal information. This includes your email address, your birthday, your hometown, your relationship status, and many other personal details about your life you may have added to your profile.
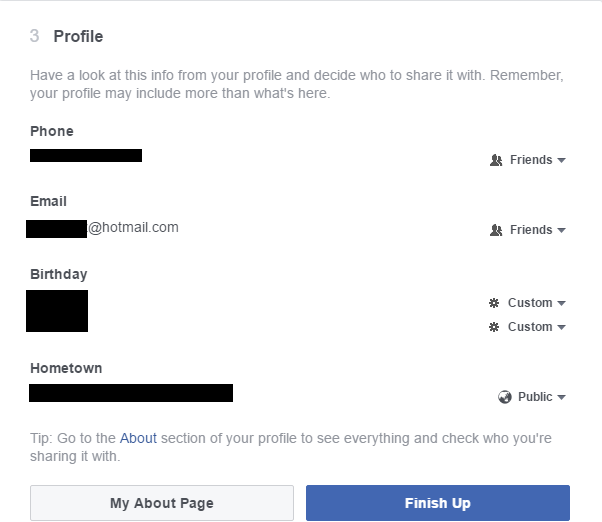
If you have ever added information about yourself, it’s very important that you review who can view it.
To change it, follow the same instructions you did for reviewing Facebook posts in Element #1.
Remember the four options:
• Public: anyone can see this information if they go to your profile (whether they have a Facebook account or not).
• Friends
• Only Me
• More Options: create a list of specific Facebook friends you would like to see your profile information.
Similar to our suggestion about who should see your posts, we recommend that you set your profile so that only you and/or your friends can see the information you put on your profile.
A Few Other Things to Make Note of:
• Under emails, your Facebook profile will automatically show the one you registered with.
• Your birthday is separated into two categories: day/month, and year. It’s done like this in case you don’t want people to know your age on Facebook.
• For the ‘Hometown’ category, advertisers use this information to target you with their ads.
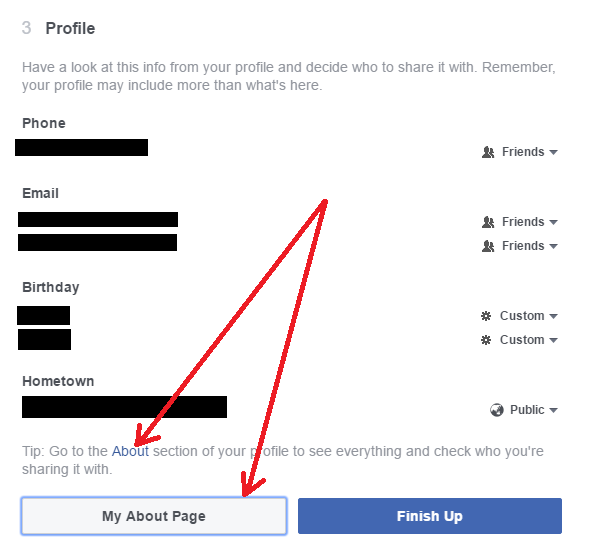
Finally – and this is the most important point – there is a lot more information you have probably shared over the course of your time on Facebook. Be sure to visit your About page, which is available at the bottom of Facebook’s Privacy Checkup page.
I Found Something in My Facebook Profile That I Want to Delete. Can I Do it?
Absolutely.
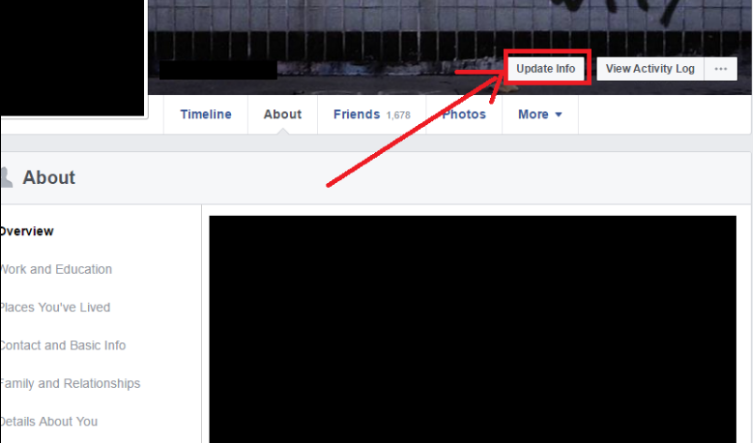
If you want to delete something, go to your About page and click on ‘Update Info’. You can find it to the right of your profile picture, as seen below.
Remember, though, deleting this information does not mean the information is no longer on the web. Deleting it from your profile just makes it easier for people to track.
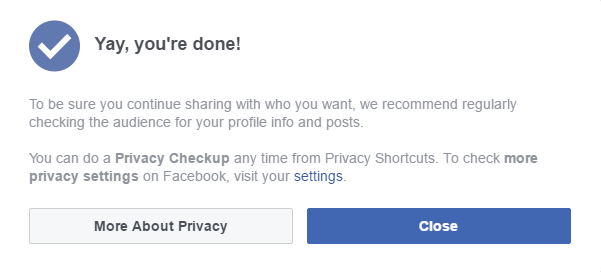
Congratulations, You’re Done!
When you finish these three elements, click ‘Finish Up’. It will lead you to this page.
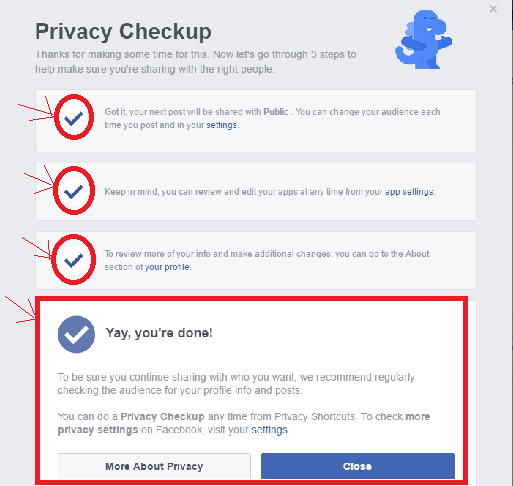
And now you’re done!
Be sure to find out more about Facebook’s privacy basics and/or check Facebook’s Advanced Privacy Settings for more information.
